


We are going to tell you about the jixel functionalities. Today we explain how to create a new jixel. Take into account that we are referring to the particular case of the demo version.
CAP Generator shows a page where you can insert data about the incident. You are also provided with a map
useful to display or select the location of the incident.
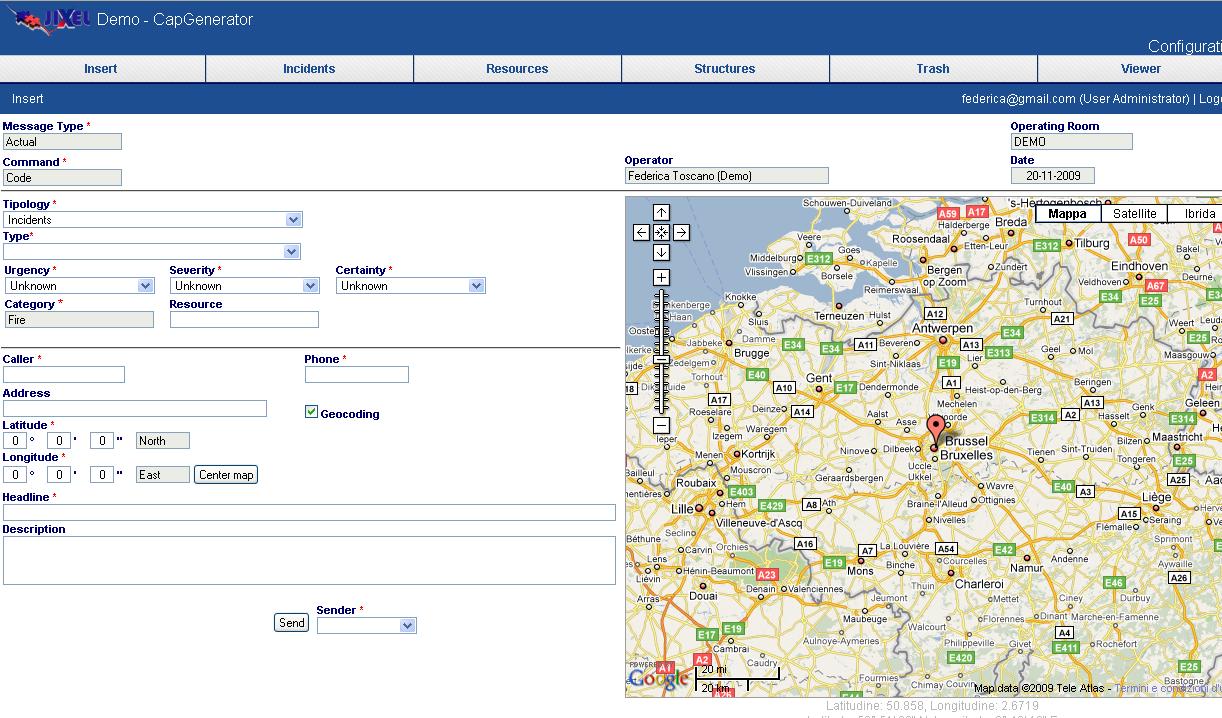
In such a case the user has to:
Select the jixel typology (incidents, resources or structures) from the drop down list
Select the type (typology detail) between the ones available in the drop down list
Select urgency, severity and certainty for the jixel
Insert information about the caller name and his/her phone number
Insert the location (Figure 8). This can be done in different ways:
Keeping the geocoding option enabled, select the point from the map and, automatically, the text boxes on the left will be filled with the address and coordinates (latitude and longitude)
Keeping the geocoding option disabled, select the point from the map and, automatically, the text boxes on the left will be filled with the coordinates (latitude and longitude)
Keeping the geocoding option enabled, enter the address in the related text box. After that you need to click anywhere on the screen so that geocoding takes place and you can see the map showing the location corresponding to the address.
Keeping the geocoding option disabled, insert manually the coordinates corresponding to the incident location.
Insert the headline and the jixel description
Select the PSAP that is responsible for the management of the jixel
Finally, once you have filled in all necessary fields, you have to press the Send button in order to store the CAP message and access the next screen where you can press the “Confirm” button to confirm the sending of the message and, therefore, to
make the Jixel available in the Cap Viewer.
You can also download the message in the CAP format (xml), just clicking on “Download”.